CategoriesDartFlutter

? Taking a picture and selecting from gallery in Flutter

Hi there! I’ve been working in an App that requires to take a picture from the app or pick it from the gallery. And here’s what I learned about it. There are many ways to take a photo using the camera. This time we’re going to use the ImagePicker plugin.

Let’s start with the dependencies.

As the first step, we need to add new plugins to our dependencies. In our pubspec.yaml we’re going to add the next plugins:

  • Camera which helps us to work with the device’s cameras.
  • path_provider gives us the correct path to store images in our devices.
  • image_picker helps us with the photo selected from the gallery.

After we add it to our pubspec.yaml, it’s going to look like this.

name: fluttercamera
description: A Flutter project that takes a picture and shows the preview.
version: 1.0.0+1

environment:
  sdk: ">=2.1.0 <3.0.0"

dependencies:
  flutter:
    sdk: flutter
  camera:
  path_provider:
  path:
  image_picker:

  cupertino_icons: ^0.1.2

dev_dependencies:
  flutter_test:
    sdk: flutter

flutter:

  uses-material-design: true

Adding a min Android SDK.

The Flutter camera plugin only works with an sdk 21 or higher in Android. So we need to open our build.gradle file located at android/app/build.gradle and search for the line minSdkVersion. Lastly, we need to upgrade our min sdk version from 16 to 21. If you don’t know anything about android development, this made the app available only from Android OS Lollipop or later.

This is how it should look like after doing that change.

Let’s create our first screen!

Let’s create our PhotoPreviewScreen, which is a StatefulWidget. In the beginning, it should look like this.

class PhotoPreviewScreen extends StatefulWidget {
  @override
  _PhotoPreviewScreenState createState() => _PhotoPreviewScreenState();
}

class _PhotoPreviewScreenState extends State<PhotoPreviewScreen> {
  @override
  Widget build(BuildContext context) {
    return Scaffold(

    );
  }
}

Now we’re going to create a Scaffold with a centered column that is going to show our image preview after we pick it from the gallery or take a picture from the camera. As of the last step, we’re going to add a floatingActionButton, which is going to show the selection dialog.

class PhotoPreviewScreen extends StatefulWidget {
  @override
  _PhotoPreviewScreenState createState() => _PhotoPreviewScreenState();
}

class _PhotoPreviewScreenState extends State<PhotoPreviewScreen> {
  @override
  Widget build(BuildContext context) {
    return Scaffold(
      body: Center(
        child: Column(
          mainAxisAlignment: MainAxisAlignment.center,
          children: <Widget>[
            _setImageView()
          ],
        ),
      ),
      floatingActionButton: FloatingActionButton(
        onPressed: () {
          _showSelectionDialog(context);
        },
        child: Icon(Icons.camera_alt),
      ),
    );
  }

Great! Now you’re probably asking what the _setImageView() and the _showSelectionDialog(context) do. The _setImageView() is a method that returns a Widget in case the Image we pick from the gallery or take from the camera is null. We’re returning a Text Widget that has the following text “Please select a picture.”

The_showSelectionDialog(context) is going to show a dialog with two options, take an image from the gallery or the camera. Let’s start creating this one. This method should use the function showDialog() and pass to it the context and a builder who is going to create an AlertDialog with a title and two options.

In the AlertDialog constructor, we’re going to pass as content a SingleChildScrollView which is a Widget that helps us to scroll the list, as a child of this Widget we’re going to pass a ListBody with two children, those children must be a GestureDetector to detect when the user touches the text.

Each GestureDetector child is going to be a Text Widget with the “Gallery” text and “Camera” text, respectively, and each onTap() method is going to be _openGallery() and _openCamera(). Methods that we’re going to create in a while. Your _showSelectionDialog(context) should look like this.

Future<void> _showSelectionDialog(BuildContext context) {
    return showDialog(
        context: context,
        builder: (BuildContext context) {
          return AlertDialog(
              title: Text("From where do you want to take the photo?"),
              content: SingleChildScrollView(
                child: ListBody(
                  children: <Widget>[
                    GestureDetector(
                      child: Text("Gallery"),
                      onTap: () {
                        _openGallery(context);
                      },
                    ),
                    Padding(padding: EdgeInsets.all(8.0)),
                    GestureDetector(
                      child: Text("Camera"),
                      onTap: () {
                        _openCamera(context);
                      },
                    )
                  ],
                ),
              ));
        });
  }

Now your app should show a Dialog like this one.

Let’s use that plugin.

Now let’s add the logic to our _openGallery(context) method. What we’re going to do first is create a field called imageFile, which is going to be a File object in our _LandingScreenState class. After creating that, we’re going to use the ImagePicker function ImagePicker.pickImage() passing to it the enumImageSource.gallery This function is asynchronous, so we’re going to add the reserved keywords async and await, later we’re going to save that variable and assign it to our property. As our last step, we’re going to call the setState() method to notify that the state has changed.

The function _openGallery(context) should look like this.

void _openGallery(BuildContext context) async {
    var picture = await ImagePicker.pickImage(source: ImageSource.gallery);
    this.setState(() {
      imageFile = picture;
    });
    Navigator.of(context).pop();
  }

The _openCamera(context) function it’s almost the same. The only thing we need to change is the source, instead of ImageSource.gallery we’re going to use ImageSource.camera. This simplicity is what I most liked from this plugin, that was so simple.

Showing the preview

Remember the _setImageView() that was at the beginning? Well, we’re going to verify that the field imageField is not null to return an Image Widget. If the image field is null, we’re going to return a Text Widget.

This is the result.

Widget _setImageView() {
    if (imageFile != null) {
      return Image.file(imageFile, width: 500, height: 500);
    } else {
      return Text("Please select an image");
    }
  }

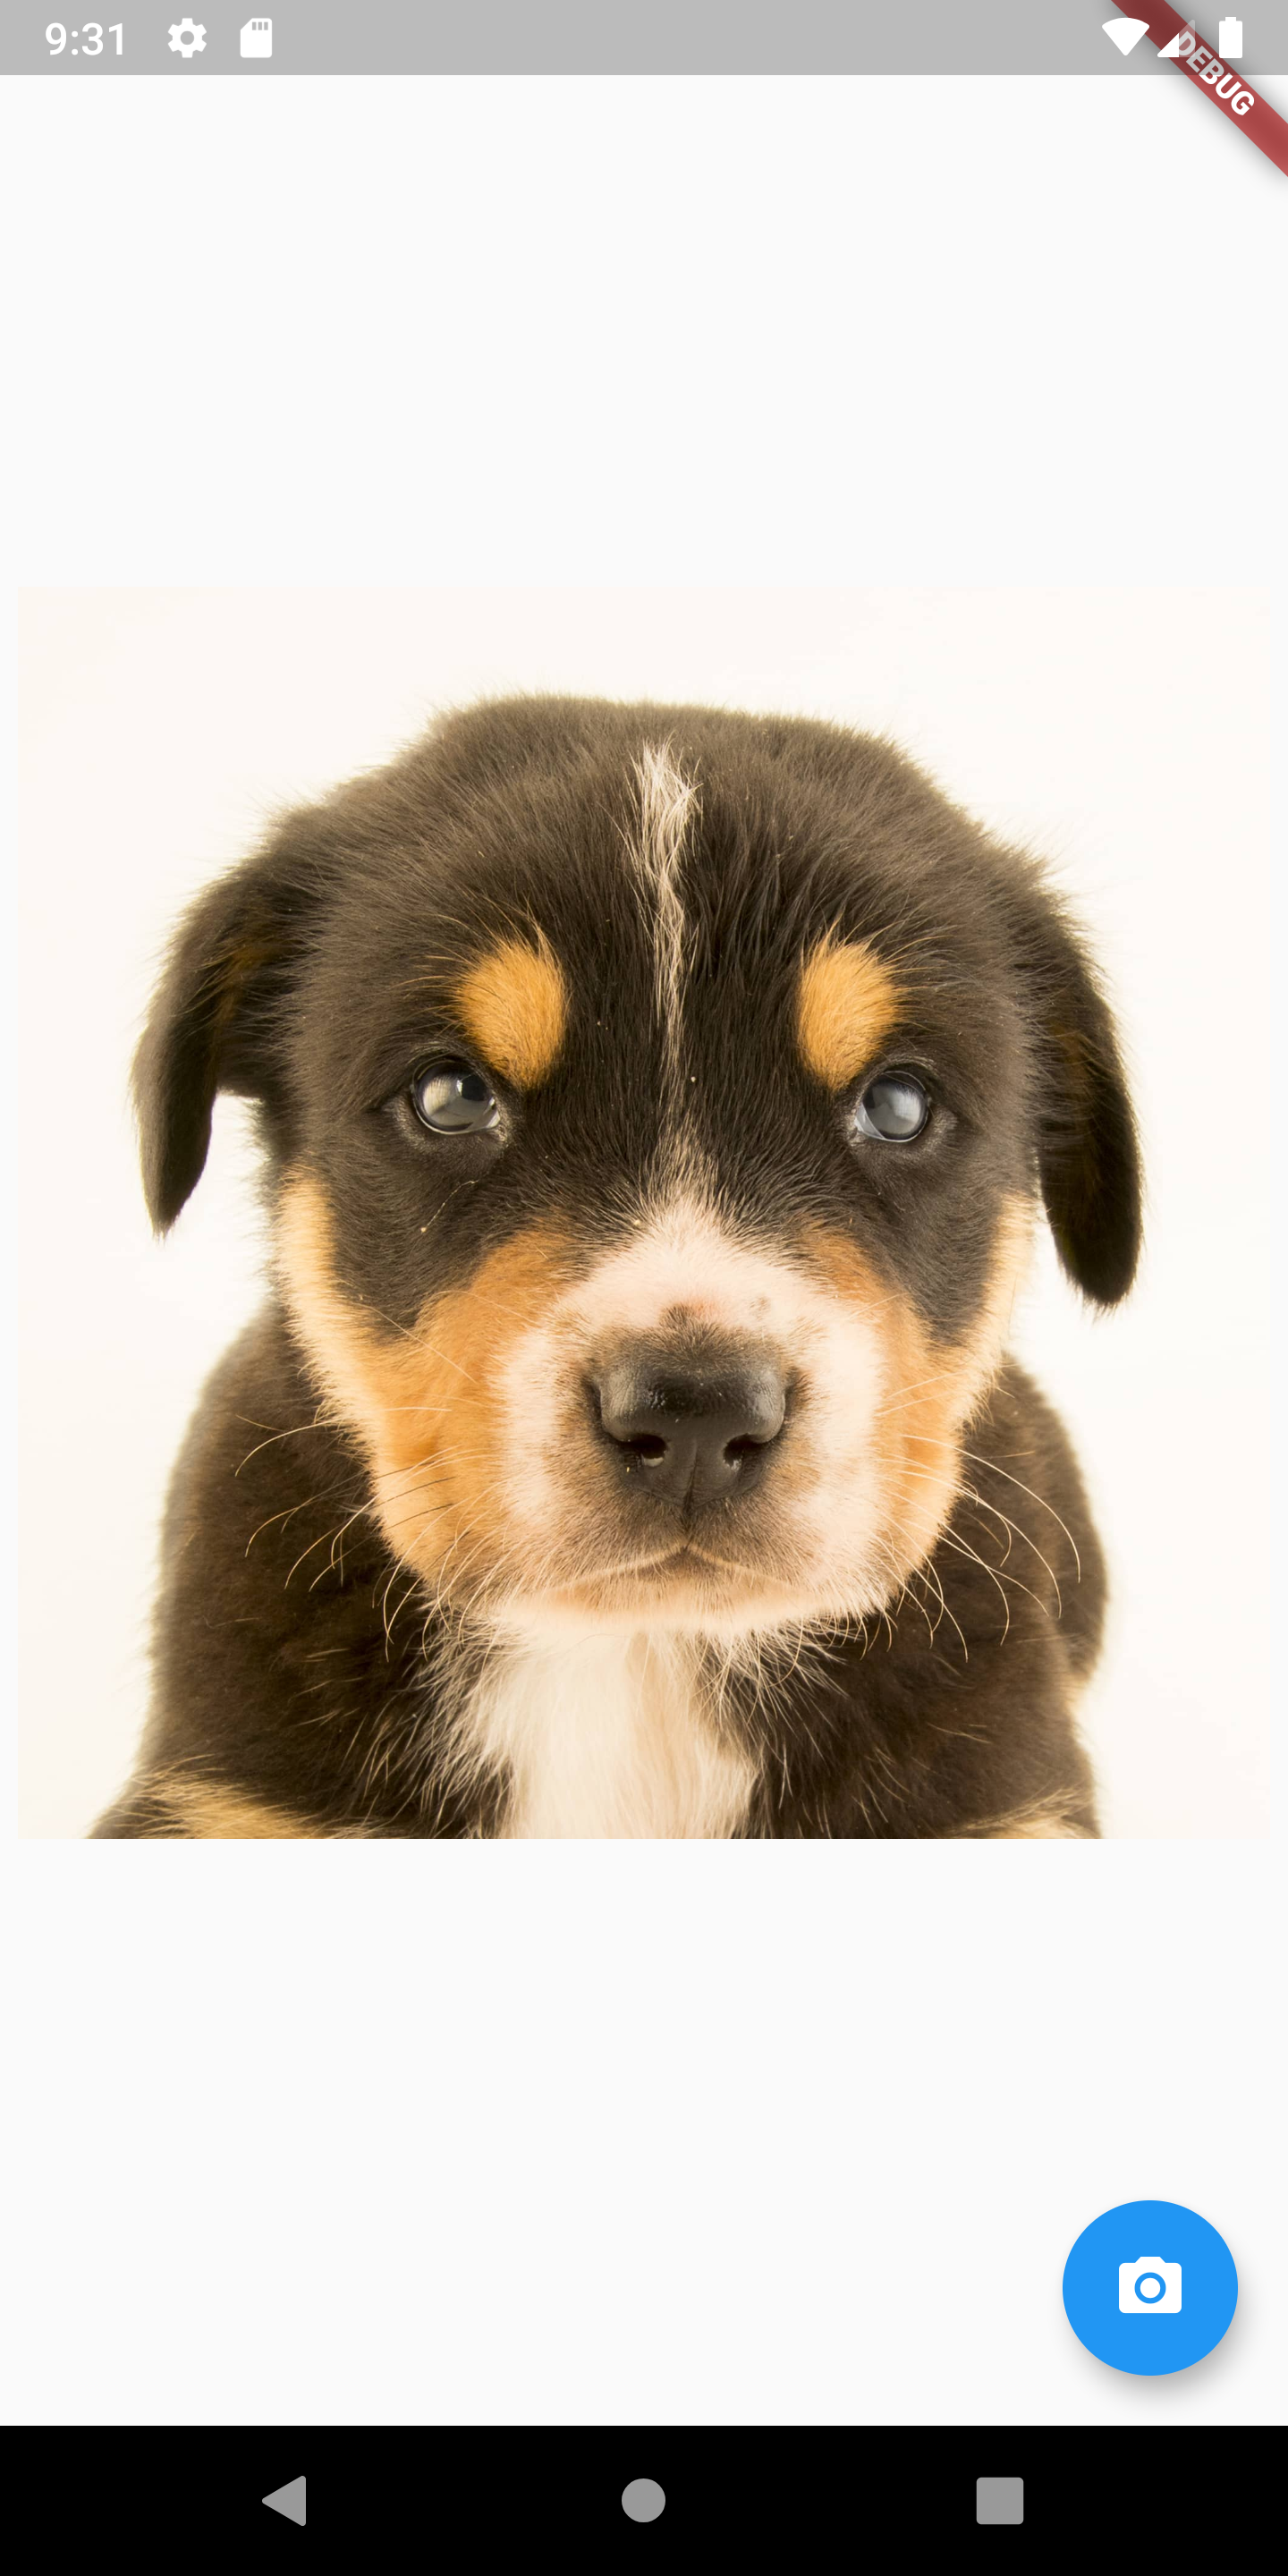
This is how your app should look after you select a image from the gallery.

That’s it

I hope you liked it! If you’re interested in more Flutter/Dart articles, you can follow me on social and say hello!.

Instagram.

Twitter.

? Click here to join the newsletter

CategoriesDart

How Classes works in Dart

Hi! We’ve been learning about Dart for some weeks, if you’ve been following this series, you know we learned a lot of topics. In this post we’re going to talk about Classes in Dart, the Classes are one of the basics of programming.

? What is a Class

A class is the object blueprint. Inside the class, we can find their properties, constructors, and functions. We already talked about functions in Dart, so we’re going to skip that part.

Properties

The class properties are variables declared inside the class. For example, if we have a class named Car, the car color can be a string variable with the value “Blue.”

Constructors

The constructors help us to initialize and set the values of our object. When we create a class and pass some variable as a parameter, we’re using a constructor.

? How to create a Class in Dart

To create a Class in Dart, we need to use the reserved keyword class and then the name of the Class. For example:

class Dog {

}

With this, we can create any Dog we want. But there’s more our Dog needs a name, so let’s create a variable that assigns that name.

class Dog {
  String name = "Rocky";
}

That’s great! Now every time we create a new Dog, it’s going to have Rocky as the name. Now we need to add our dog’s ability to bark. For that, we need to create a function.

class Dog {
  String name = "Rocky";

  void bark(){
    print("Woof Woof! ?");
  }
}

We already have a blueprint for a Dog named Rocky who can bark. All we need to do is create an object from this blueprint is use the constructor.

var MyDoggo = Dog();

The previous example shows us how we can create a Dog object using a default constructor. But what if we want to create another dog with another name? Not all dogs are named Rocky.

? Creating uniques dogs with constructors

To assign the name of our Dogs, we need to create a Constructor inside the class, which can help us to initialize our Dog objects with their name.

class Dog {
  String name = "Rocky";

  Dog(this.name)

  void bark(){
    print("Woof Woof! ?");
  }
}

Now we can create our Dogs using the following code.

var doggo = Dog("Sparky");
doggo.bark();

There are more Constructors. We’re going to talk about those in the next CodingSlices Extended. Remember to follow me, so you don’t miss it.

? Finally, here is a spooky dog.

That’s it

I hope you liked it. Do you want to learn more? I’m also creating new CodingSlices about Flutter on Instagram, feel free to follow me in @codingpizza for more content.

I’m also writing an eBook, which is a basic course of Dart. It’s about all you need to know to get started with Flutter. It’s free, and you can sign-up here.

Now is your turn

You can try these concepts in IDE like Intellij idea community, which is free. All you need is to install the Dart plugin. Visual Studio Code or in some online editors like Dartpad.

Previous post

If you’re interested in more posts like this, you can check out my others post about Dart.

Variables

Functions

Parameters

Control flow

Collections

Powerful list functions in dart that you should know


CategoriesDart

Powerful list functions in Dart that you should know

Powerful list functions in Dart that you should know

In the previous post about Dart, we talked about Collections in Dart. We spoke about List, Maps, and sets. And today, we’re going to talk about some functions that are awesome and can help you in many cases.

Note: In this post we use in various cases the anonymous function, if you are not familiarized with it, you can check my other post about functions.

Map

The map function exists in many programming languages, and Dart is not an exception. This function creates a new list after transform every element of the previous list. This function takes as a parameter an anonymous function. Let’s see an example.

var list = List.of({1,2,3,4});
var mappedList = list.map( (number) => number *2);
print(mappedList);

In this example, we create an anonymous function that has a number as a parameter, and we multiply that number per two. The result of this function is:
(2,4,6,8)

Sort

Sometimes you receive a list from the server, and you need to show it to the user. But what if you need to apply some filter and sort it in an ascending way? Well, this function can help you. Let’s see an example.

var randomNumbers = List.of({14, 51, 23, 45, 6, 3, 22, 1});
randomNumbers.sort();
print(randomNumbers);

This is the result.

[1, 3, 6, 14, 22, 23, 45, 51]

Generate

This function is great when you need to create a list of numbers for a test. It takes as first parameter a number, which indicates the size of the list and an anonymous function which tells the generate() function how to create the numbers inside the list.

Here’s an example.

var generatedList = List.generate(10, (number) => number * Random().nextInt(50));
  print(generatedList);

In the example we can see how we can generate a list of ten elements and multiply it by a random number from 0 to 50.

Take

The take function literally takes the first elements from the list. This can be useful when you have a list of winners and want to take the top 3. Here’s how you can use it.

var list = List.from([1,2,3,4,5,6]);
var topThreeList = list.take(3);
print(topThreeList);

The result of this example is: 1,2,3

Skip

The skip function is the opposite of the take function. This function ignores the first elements and creates a list of the remaining ones. This example shows how you can use it.

var list = List.from([1,2,3,4,5,6]);
var skipList = list.skip(3);
print(skipList);

The result is: 4,5,6

Where

This function is one of my favorites. It helps us to create a list of elements that satisfy a predicate. That means that your element list is going to have only elements that meet your requirements. Let’s say that you need to create a list of only even numbers.

var randomNumbers = List.of({14, 51, 23, 45, 6, 3, 22, 1});
var evenNumbers = randomNumbers.where((number => number.isEven));
print(evenNumbers);

The result of this example is 14,6,22.

An awesome tip

These function can be combined to achieve a greater solution. You can combine a where function with a sort function to get the even numbers sorted in ascending way.

var randomNumbers = List.of({14, 51, 23, 45, 6, 3, 22, 1});
var evenNumbers = randomNumbers.where((number) => number.isEven);
evenNumbers = evenNumbers.toList()..sort();
print(evenNumbers);

In this example we take only the even numbers from the randomNumbersList, then we convert these numbers to a List finally we use the cascade operator.. to sort() the list in an ascending way.

The final result is: [6, 14, 22]

That’s it

I hope you liked it. Do you want to learn more? I’m also creating new CodingSlices about Flutter on Instagram, feel free to follow me in @codingpizza for more content.

I’m also writing an eBook, which is a basic course of Dart. It’s about all you need to know to get started with Flutter. It’s free, and you can sign-up here.

Now is your turn

You can try these concepts in IDE like Intellij idea community, which is free. All you need is to install the Dart plugin. Visual Studio Code or in some online editors like Dartpad.

Previous post

If you’re interested in more posts like this, youcan check out my others post about Dart.

Variables

Functions

Parameters

Control flow

Collections


CategoriesDart

Collections in Dart

Hello everyone, this week we’re going to talk about Collections. Collections are a crucial part of every project. As always let’s start with what are Collections.

Collections are objects that groups multiple elements inside of them; a List is one of them.

Let’s say we have a list of lottery numbers. We can create a list from it.

The lotteryNumbers is a List,which is part of Collections. In Dart, we can create a List in different ways.

Using var

You can create a null list using the reserved keyword var and the name of the list.

Null VS Initialized

There’s a difference between a null list and an Initialized list. I recently found an image that explains it well.

An empty list is when the list exist but there is not element on it. Null instead means you don’t have a list initialized yet offcourse there’s a more scientific way to explain this, but this is a good example to start.

You can create list as follows.

If you’re curious, you can try to print the size of each list using the .length property and compare the results.

Creating a list for a specific type

If we need to create a list from one specific object type, we need to specify it inside angle brackets in the following way.

In this example we’re creating a list of only String objects.

In case we need to create a list with multiple object types, we need to use the dynamic keyword instead of String.

You can also create a list using the List.of function, we already used this way in the first code snippet.

Retrieving elements from the list

In case you need to retrieve an element. What you need to do is to use brackets beside the List name. This gives you the element from that list in that position. Also you can use the elementAt() function.

Here’s an example:

The result of this example is going to be the first number of that list, in our case the number 1.

Adding an element from the list

This time we’re going to add an element to an already created list. All we need to do is to use the .add function and pass as parameter the number we want to add.

Add items are pretty straightforward

Deleting an element from the list

This time we’re going to do the opposite, we’re going to remove an element from the list. What we need to do is to have the position of the element and use the .removeAt() function.

Which number do you think we removed from this list? If your answer is number 1. You were close, but that’s incorrect, we removed the number 2 because the list position starts from 0.

Value  -> [1,2,3,4,5]
Position->[0,1,2,3,4]

Another type of Collections

Introducing Maps, Maps are unordered key-value pair collection which helps us to associate a key to a value. You can create a map specifying the key type and the value type as follows:

After this reference from the nineties, we can see that each Power Ranger has a dinosaur associated with.

Obtaining an item from a map

Sometimes we need to recall only one of our Zords, how we can do it in a map? All you need to do is indicate the key inside brackets just after the name of the map.

This example returns the Zord of the red ranger.

How to remove a ranger from the map

If you need to remove an element from the map what you need to do is to use the .remove() function and pass as parameter the key. Here’s an example.

How to add a new ranger to our map

When we have a new member in our crew, we need to create a map and then assign it to that map the key and the value only after that we can add that ranger to our map. Here’s an example.

As you can see in this previous example, we created a map with a string key and a string value. Then we assign the key inside the brackets and assign the value “Sabertooth Tiger” to that key.

Last but not least

We can’t talk about Collections without mentioning Sets. A set is an unordered collection of unique objects. Two things worth mentioning about sets are: First, you cannot get an item by index and second, adding a duplicate
item has no effect.

Here’s an example about how to create a set

Remove from the set

If we need to remove an element from the set we can use the function .remove().

Adding an item to the set

When we need to add an item to the set we use the .add() function.

As I mentioned before we can’t add a duplicate object to the Set.

That’s it

If you’re new into programming, I hope this helps you, and if you’re not, I hope you liked it. I’m also creating new CodingSlices about Flutter on Instagram, feel free to follow me in @codingpizza for more content.

I’m also writing an eBook which is a basic course of Dart It’s about all you need to get started with Flutter. It’s free and you can sign-up
here.

Now is your turn

You can try these concepts in IDE like Intellij idea community which is free. All you need is to install the Dart Plugin. Visual Studio Code or in some online editors like Dartpad.

Previous post

If you’re interested in more posts like this, you can check out my others post about Dart.

Variables

Functions

Parameters

Control flow


CategoriesDart

Control flow in Dart

Control Flow

Hi there!, in the last month I’ve been writing about Dart and how things work in this language. If you’re new here, you can check my other post about Dart. I’ll leave it down below.

Variables

Functions

Parameters

Power without control is useless.

In this post, we’re going to talk about how Control Flow, works in Dart. Let’s start with what it is, Control Flow. In simple words is the order in which your code is executed.

Let’s say we need to choose between going outside with an umbrella or not. We check our Weather app, and if it says it’s going to rain we take it with us, otherwise we can leave it at home.

If we want to write that in code, this can be.

if (isGoingToRainToday()) {
 takeUmbrella() 
} else {
 print ("What a great weather today ?")
}

If statements

The if statements help our code to make a decision, it has the following syntax.

if (condition) {
 doThis()
} else {
 doAnotherThing()
}

We start with the reserved keyword if, then we add a condition inside the parentheses. If that condition is met the code inside the first curly braces is going to be executed. Otherwise, the code after the else statement is executed. The condition at the end is a Boolean value; let’s see an example.

In the previous example, we wanted to check the weather to know if we needed to take the umbrella with us. But what isGoingToRainToday() is? Well is a function which returns a boolean. It looks like this.

Boolean isGoingToRainToday() {
	return false
} 

Here’s a tip the else statement is not always needed. If you only need to execute what it is inside the if statement you can omit it.

If you need to make a comparison with more than two options you can also use an else if statement, let’s see how it is.

var flavor = "Vanilla";
if (flavor == "Vanilla"){
	print("Here's your vanilla ice cream");
} else if( flavor == "Chocolate") {
	print("Here's your chocolate ice cream");
} else {
	print("Since we don't know your favorite flavor, here's a random one");
}

In this example we have a favorite flavor of ice cream, the if statement is going to check if the flavor is vanilla if it is not, is going to try the else if condition. If any of the condition mentioned before are met, the else statement is going to be executed.

What happen if we have too many flavors?

Introducing the Switch case

The switch statements work with variables instead of a condition if the switch has a “case” for the value of the variable the code inside that case is going to be executed. If the switch can’t found a case for it, the code inside the default case is executed.
Here’s an example.

var flavor = "Vanilla"
switch (flavor) {
	case "Vanilla":
		print("Here's your vanilla ice cream");
	case "Chocolate":
		print("Here's your chocolate ice cream");
	case "Orange":
		print("Here's your orange ice cream");
	default:
		print("Since we don't know your favorite flavor, here's a random one");
}

The for statement

The for statement is a common statement that exists in almost every language. Is used to iterate an array of objects. The syntax in Dart is as follows:

for (var i = 0; i < list.length; i++){
 print(list[i]);
}

This statement may look confusing but let’s split this declaration, the variable i start at value 0, and it will increase by one until it reaches the length minus one of the list.

For each time the variable increase by one, the code inside the braces is executed. This print that “i object” from the list.

The for statement is useful when you know when it’s going to end. In our case, we now it because list.length is limited.

While statement

The While statement on the other side works better when you don’t know when a condition is going to meet. It will execute the code inside the braces until the condition is met, for example.

int laps = 0;
while (laps < 5){
	print("Laps $laps");
	laps++;
}

In this example, the code inside the while is executed until the laps are less than five.

Laps 0
Laps 1
Laps 2
Laps 3
Laps 4

The sibling of the while is the do while

Introducing the sibling of the While statement, the Do while statement. This statement executes the code and after the statement evaluates it. Here’s an example.

int countDown = 5;
do {
 print("Time remaining: $countDown");
 countDown--;
} while (countDown != 0);

This code is going to print the countDown variable while it’s different than zero. Here’s the result.

Time remaining: 5
Time remaining: 4
Time remaining: 3
Time remaining: 2
Time remaining: 1

That’s it

If you’re new into programming, I hope this helps you, and if you’re not, I hope you liked it. I’m also creating new CodingSlices about Flutter on Instagram, feel free to follow me in @codingpizza for more content.

Do you know I’m also writing an eBook which is a basic course of Dart. All you need to get started with Flutter. It’s free and you can sign-up here.

Now is your turn

You can try these concepts in IDE like Intellij idea community which is free, all you need is to install the Dart Plugin. Visual Studio Code or in some online editors like Dartpad.

Previous post

If you’re interested in more post like this you can check out my others post about Dart.

Variables

Functions

Parameters

CategoriesDart

Parameters in Dart ¿What types exist?

Parameters

Hi there! In the last post, we’ve been talking about variables and functions. If case you missed it, you can check our previous post here.

Variables

Functions

We saw them previously.

On the previous post about functions, we talked about parameters. We saw an example in which we need them as ingredients to do a IceCreamMachine works. We can also say that parameters are dependencies that a function requires to execute their code.

Required parameters

The required parameters are the most basic parameters that a function can use, you specify a type, a name, and you’re ready to go.

We already saw them in the previous post on the sum function example:

The integer a and the integer b, are used inside the function and then are returned.

Optional parameters

These parameters are optional because you can omit them when you use that function. To make a parameter optional, we need to put them inside brackets and at the end of the signature, if you’re using required params. Let’s see an example.

In this function, we can see how the optional parameter is placed before the required parameters if you put the optional parameter first the compiler would complain.

Ok, but what happened with the variable $secondName if it is not passed? The variable is going to be null. We don’t want to print “John null Wick.” for that, we can add a default value that we’re using later in case the optional parameter is null.

To add a default value to an optional parameter, all we need to do is an assignment. You can see it better in the following example:

Now the value is going to be an empty string, and the name will print correctly.

Let’s talk about how we can use the previous function. We actually can use it as follows:

You can make all your parameters optional by wrapping your parameters with brackets, in this way:

Named Parameters

This type of parameters allows you to indicate in the function signature which parameter are you passing into it. For that, we need to surround our parameter with curly braces.

Here’s an example:

In this example, we’re using the name and the surname as required parameters. And the second name as a named parameter and in case nothing is passed to it the value will be an empty string.

When we want to use the last function with the optional parameters, we use it in the following way:

As you can see the named parameter should be included inside the parentheses.

In case we need to have a function with only named parameters, all we need to do is surround all the parameter section in the function signature with curly braces.

With the last function, we can specify the parameters but also change the order in which we use it because the order of the parameters doesn’t matter.

For example:

Isn’t it amazing? The named parameters improve the function readability a lot.

Now is your turn

You can try these concepts in IDE like Intellij idea community which is free, all you need is to install the Dart plugin. Visual Studio Code or in some online editors like Dartpad.

Previous post

If you’re interested in more post like this, you can check out my other articles about Dart.

Variables

Functions

Learn more

If you liked this post, I’m writing more like these in a free ebook which is a basic course of Dart that can help you to later start with Flutter, that awesome framework for develop multiplatform apps. If you’re interested, you can get it for free following this link.

CategoriesDart

Functions in Dart

In this section, we’re going to talk about functions, how it works on Dart and the function types.

?What is a function?

A function is a block of code that should be organized, perform a single task, and should be related to the class we’re working on.

Functions should also be reusable. This would reduce the quantity and increase the quality of your code. If it is done correctly.

?‍?Function anatomy

There are many function types in Dart. First, we’re going to learn about how a function works then we’ll going to explain the other function types.

The functions are usually created with the following syntax:

Where:

void is the return type of the function. This means that when the function executes all the code inside, it should return this value.

Wait a minute. We’re not returning anything, and we’re just printing a name. And that’s because when we don’t need to return a value, we use the reserved keyword void.

printName is the name of the function, a name we’re going to need to use it later, the name should explain what this function is.

(String name), inside this parentheses, we’re going to specify the type of the parameter and the name of that parameter. Parameters are variables that are available inside the function, and we’re going to talk more about parameters in the next chapter.

Let’s see a classic example:

This function helps us to sum two integers, we provide the first value and the second value, and it returns the sum of both. We can use it as follows:

In this code, we created a variable called result which stores the result we get from the function sum,

when we print it the result is 4.

In a nutshell, we can say a function works like an ice cream machine, you add the ingredients (parameters), and it should return you a delicious ice cream. Let’s see another example:

In this more advanced example, we created a function called IceCreamMachine which returns an AwesomeIceCream object. And object is an instance of a class. We’re going to discuss it later. But keep in mind that AwesomeIceCream is an object like Strings, Integer or Double.

➡️Arrow function

The arrow function is a function that can have only one line of code, you may notice that it has no braces instead has an arrow.

This type of function helps us to keep our functions small and improve the code readability. Let’s convert our other examples to an arrow function.

Let’s start with the sum function. In the first place, we need to remove the braces and add the arrow; after the arrow sign, we add the logic of our function. That’s it! You successfully created your first arrow function.

Now why don’t you try to convert the ice cream machine function?.

?️‍♀️ Anonymous function

As we say before the functions should have a name, but in the case of the Anonymous function, it doesn’t, this function are called in-site a passed as parameters to other functions ?.

Note: What the forEachFunction does is to execute the code inside of it for each element in the list. We’re going to see more about these functions and collection in another chapter.

This is going to have the following output:

We have the chocolate flavour
We have the vanilla flavour
We have the orange flavour

What happened here?. The forEach() function receive as parameter a Function, in Dart Function is a type like any other.

For the anonymous functions the syntax is the following:

If you’re still confused you can see it as a shorthand for the following example:
Let’s say that you have a list that you want to iterate to print items, but you don’t want to do the print items in the same method that you’re right now. Something like this.

Because we want to have that logic in another method, we can create a function called getPrintElementFunction().

This function returns a function ?. This function is quite rare. You can use the function inside your forEach method as follows:

This code could compile and is going to print the same result as the function we saw before, but it’s quite ugly if you’re going to do something simple inside of it.

Now is your turn

You can try these concepts in IDE like Intellij idea community which is free, all you need is to install the Dart Plugin. Visual Studio Code or in some online editors like Dartpad.

Previous post

If you’re interested in more post like this you can check out my others articles about Dart.

Variables

Learn more

If you liked this post I’m actually writing more like these in a free ebook which is basically a basic course of Dart that can help you to later start with Flutter, that awesome framework for develop multiplatform apps. If you’re interested you can get it for free following this link.

CategoriesDart

Variables in Dart

What are variables?

In this post we’re going to learn about variables in Dart, variables are like tiny-boxes that keeps references to a value, and this tiny-box can have a name so we can identify and remember it pretty easily.

How do we create them in Dart?

In Dart, we can create variables in three ways:

Using the reserved keyword var

We can create a variable using the reserved keyword var before the name of the variable and the value. Here’s an example:

This is called Type inference. What it does is that the compiler can automatically deduce the type of the variable or an expression.

Declaring the type of the variable

We can also declare the type of the variable as follows:

Using the reserved keyword dynamic

The dynamic keyword allows us to declare a variable that the type can change at execution tyme and can be defined in this way:

Now is your turn

You can try these concepts in IDE like Intellij idea community  which is free, all you need is to install the Dart Plugin. Or in some online editors like Dartpad.

Learn more

If you liked this post I’m actually writing more like these in a free ebook which is basically a basic course of Dart that can help you to later start with Flutter, that awesome framework for develop multiplatform apps. If you’re interested you can get it for free following this link.


Este sitio web utiliza cookies para que usted tenga la mejor experiencia de usuario. Si continúa navegando está dando su consentimiento para la aceptación de las mencionadas cookies y la aceptación de nuestra política de cookies, pinche el enlace para mayor información.

ACEPTAR
Aviso de cookies